How to Start Your Developer Blog: A Step-by-Step Guide
So you’re thinking about starting your own developer blog.
That’s great! I personally believe it is very beneficial for any developer to have their own blog.
There are three main reasons for this. With a developer blog, you can:
- Improve technical and communication skills. You never truly understand something until you can teach it to a six-year-old. A disclaimer: not everyone who reads my articles is a six-year-old. This quote says more about the teacher than it does the audience. Teaching forces me to learn with depth. As such, it forces me to break down concepts simply so that I can reach people at all stages of the learning process. To me, that’s very valuable, and I believe that’s what a blog can do for you.
- Make side income. While I don’t think this should be your end goal, it is a possibility! With a growing audience, you can use advertisements and affiliate programs to earn some extra money each month.
- Build an online presence. An online presence will open up many opportunities for you in the future. If you establish authority in a field, you will build a strong network with other developers and bloggers. This can drastically change your career path in many different ways.
Let’s get started with this developer blog! You can call it a programming blog, a Computer Science blog, a coding blog, a software blog, or a developer blog. It’s all pretty much the same thing.
In this article, I’ll go through step-by-step how many developers set up their own blogs. By the end, you should have:
- A self-hosted WordPress blog that appears on Google
- A domain from Namecheap
- A web host on DigitalOcean
- A valid SSL certificate for your domain from Let’s Encrypt that will auto-renew
- Theme and plugin recommendations
- Basic knowledge of keyword research for your blog
Hopefully, you learn something along the way, too!
Without further ado, let’s get started.
1. Register Domain Name
Your domain name is simply your website name.
For instance, the domain name of this site is logfetch.com.
But how does this domain name bring me to this particular site?
Firstly, sites are stored on web servers. The files that display my website (e.g. HTML, CSS, JavaScript) live on a web server.
Secondly, web servers have unique IP addresses. We use IP addresses to indicate which web server we want to talk to.
Lastly, domains are associated with IP addresses. When you type a domain in the URL bar, your operating system queries what we call a DNS server to find the IP address associated with that domain. A DNS server is essentially a dictionary of domains mapped to IP addresses. After obtaining the IP address, your browser will request the website files from the server with that IP address to display the webpage.
To make this more practical, you can find the IP address of any site like so:
$ dig +short logfetch.com
157.245.220.118
You can actually skip the DNS server domain-to-IP translation by directly typing the IP address into the URL bar.
Domains were invented to prevent us from having to memorize IP addresses.
Explanation: Domain Names
Keep it simple. It’s best to keep your domain names short, memorable, and easy to pronounce. Make sure it rolls off the tongue. This is what you’ll be sticking with for the rest of this site’s lifetime, so take time to think it through.
Keep it relevant. The goal of your developer blog is for others to read your work and to learn from it. Putting keywords (e.g. dev, software, code, etc.) into your domain name will help Google understand what your site is about. Once Google understands your site enough to know when to recommend your site to users, people will start finding your blog.
Research your name. Found a great name? Great! Now directly search that name in Google, Facebook, Instagram, Twitter, and anything else you can think of to see if anyone is already living under that alias. Find a combination of words that suits your development topic and is unique!
Tip: try to avoid hyphens, numbers, as well as any extension that is not .com. People usually assume that websites end in .com, so it’ll save your users some time and confusion.
Where do you buy these domains, though?
Many of the hosting services that I explain in the next section provide a free domain for a year if you use their web hosting.
However, for my sites, I use NameCheap because they have great customer support and their domains are cheap!
Walkthrough: NameCheap
This section isn’t quite a “walkthrough” per se since NameCheap is super simple to use.
NameCheap is a domain registrar that we’ll use to buy domains and configure the domain to map to a specific IP address.
If you search for a domain, NameCheap will tell you whether it’s available and what the cost is per year. For an ordinary domain without a sale, it should be less than $10 per year. Not bad!
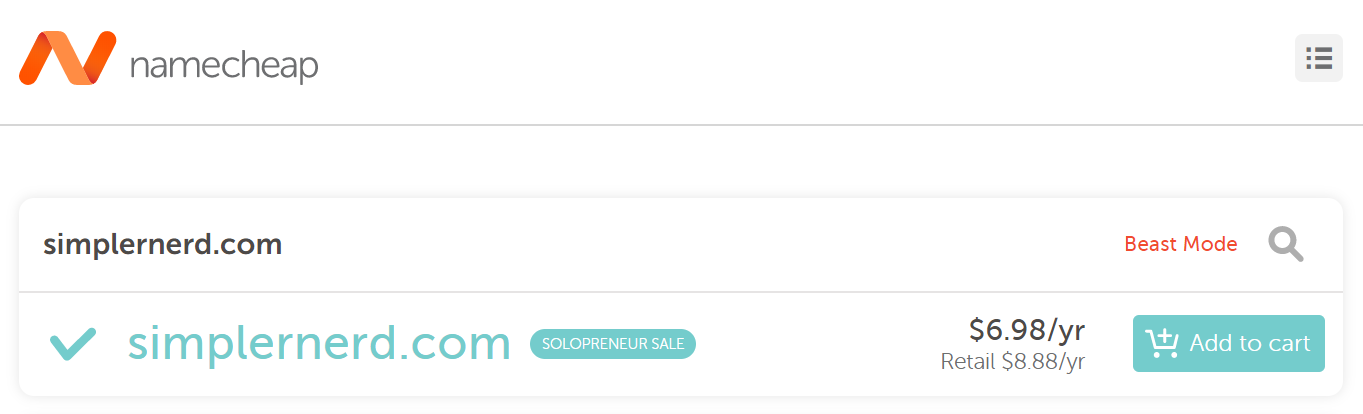
Once you find a domain that you’re proud of and buy it, you can go ahead and get started with web hosting!
2. Set up Web Hosting
Every single website you access is backed by a web server.
A server is just a computer. You make requests to it, and it responds to those requests. In terms of web hosting, web servers hold the files that display your website.
Every time someone accesses logfetch.com, a request is made to a web server, which then returns the necessary files to load my website into the browser.
Remember that a server isn’t some magical machine. Your laptop could be a server. The only problem is that this server needs to be on 24/7 and needs to be able to handle the traffic your blog receives.
That’s why there are computers dedicated to being web servers and hosting people’s websites.
The companies that give us access to these web servers are web hosting services.
To clarify, I currently use DigitalOcean, but I want to explain the differences between what cloud hosting providers like DigitalOcean offer and what traditional web hosting services offer.
Explanation: Web Hosting Services
There are tons of web hosting services you could use, all of which have their own perks and features.
All of the options I list below are geared towards the non-technical crowd. Most of the work will be done for you, so no knowledge of servers is required.
This is always a great option if you want the website up and running as fast as possible in order to focus on content right away.
These are three options that I’ve personally used and found sufficient for my blogging purposes.
Each has a very simple, intuitive interface for getting started blogging.
If you want to understand more about other web hosting services, such as Hostinger, SiteGround, and Domain.com, I would recommend going over to Hosting Facts, the go-to place for web host comparisons.
Explanation: Web Hosting Plans
You’ll notice that all of these hosting options provide different hosting plans, namely Shared, Virtual Private Server (VPS), and Dedicated Hosting.
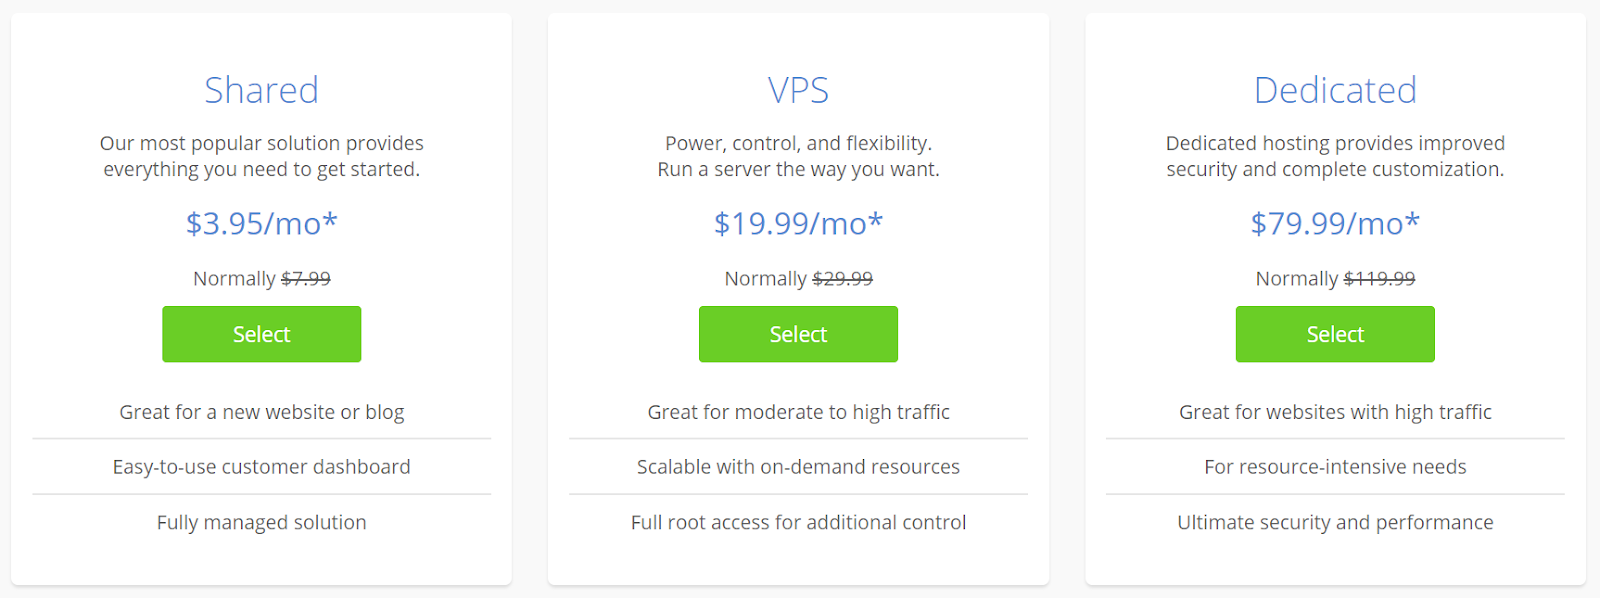
At the end of the day, your website will be up and running with any of these three plans. The only things you will be deciding between are price, speed, security, and scalability. I’ll go over briefly what each plan entails.
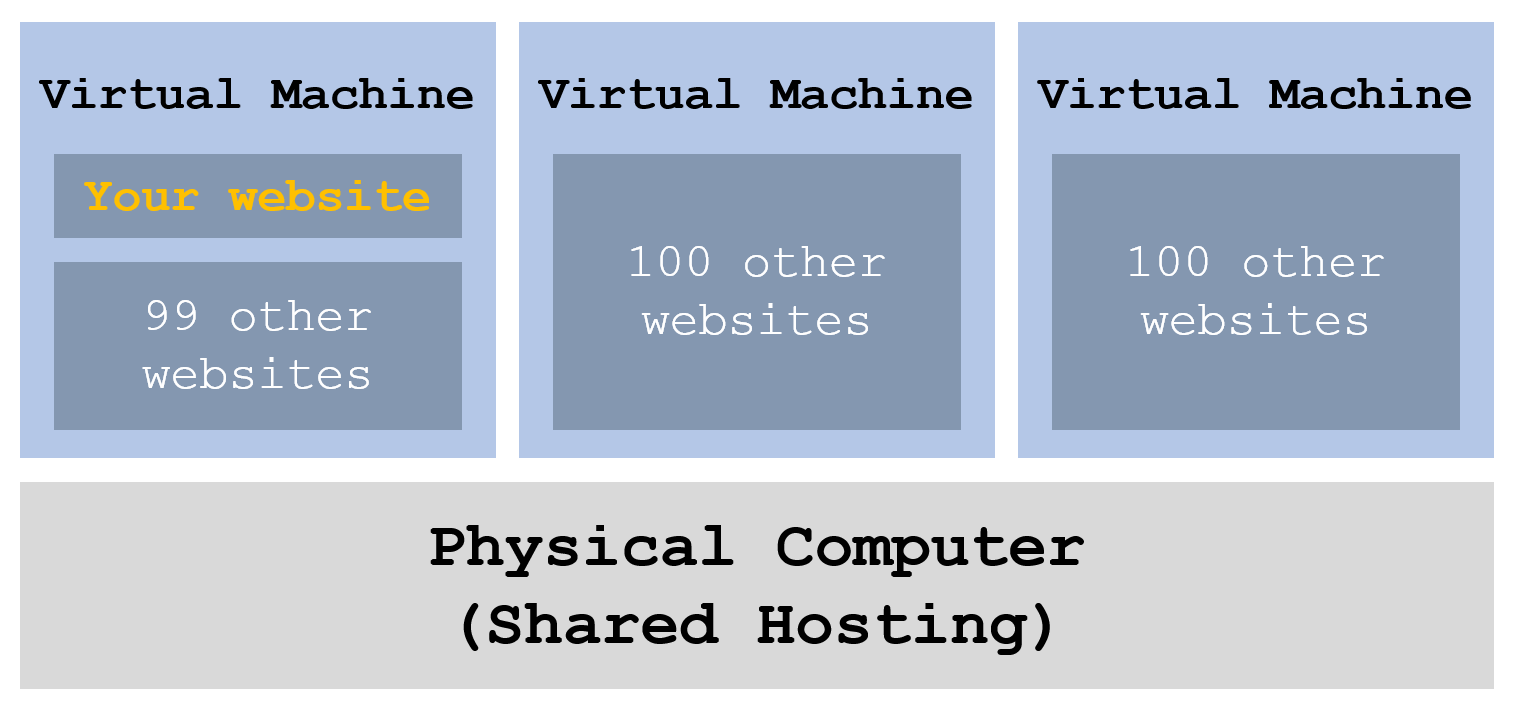
Shared Hosting
Shared Hosting is a very popular option for starting bloggers since they don’t require high performance. In this option, your website will share resources and space on a virtual machine (VM) with other websites.
Due to the shared space on the VM, speeds may suffer (page loading), security isn’t guaranteed (memory leaks from other websites), and scalability is difficult when traffic grows (limited bandwidth and storage).
Prices, however, range from $3.95 to $9.95 per month depending on the web host, which is very cheap!
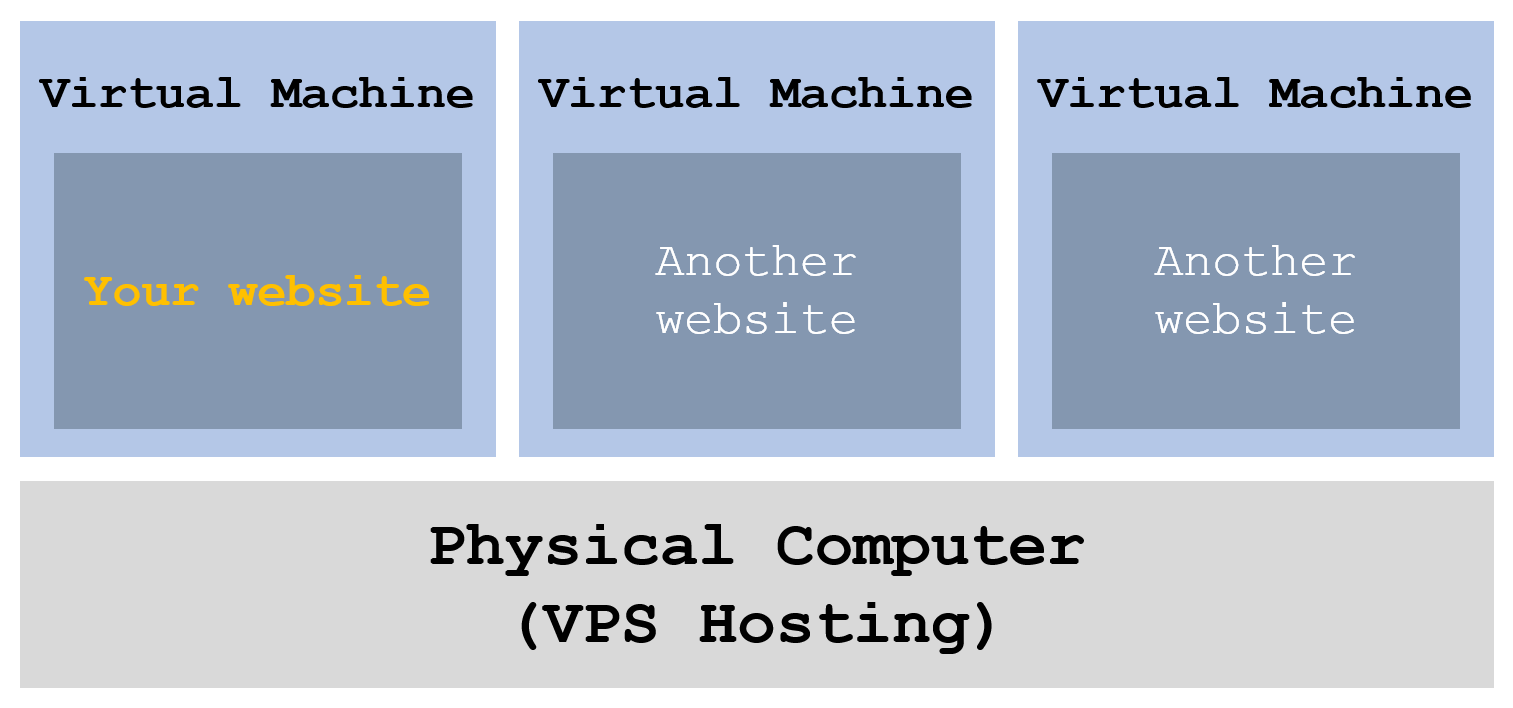
VPS Hosting
VPS Hosting is generally used when traffic starts to pick up. In this option, you own an entire virtual machine with root access, ensuring customizability. Speeds increase from Shared Hosting since you are guaranteed a baseline of resources. Security from other websites is better since you are given a dedicated section of the physical server. Having a single VM to yourself inherently provides more scalability.
Prices range from $20 to $100 per month for VPS Hosting.
Dedicated Hosting
Dedicated Hosting allows for complete control over an entire physical server. You have access to all the server resources, which allows for high performance. You are the only one operating on that box, so security from other users is guaranteed (you’re the only user!). You’ll get great customer service as well.
Prices range from $80 to $500 per month for this plan.

Some hosting services also offer WordPress Hosting, which can also work if you decide to use WordPress as I do.
All that being said, I currently run my site on DigitalOcean, a cloud hosting provider.
Cloud Hosting
Cloud Hosting may be offered by your provider, but I would recommend using DigitalOcean if you decide to go this route.
This option is based on the idea that an unlimited number of machines can act as one system. Instead of your website using resources from one physical server, you will be drawing resources from potentially an infinite number of servers. Essentially, you are using the resources of multiple physical servers and multiple VMs to create one massive VPS.
Due to the potentially infinite number of servers, this option can provide very high performance if needed and is very scalable (just add more machines). Similarly, this is a very reliable option. If one server fails, another can simply take its place.
Price varies depending on the number of machines you are using. This is a cost-efficient option since you only pay for the resources that you use.
Walkthrough: DigitalOcean
Okay okay. Enough talking. More doing. Let’s set up our web hosting on a DigitalOcean server.
First, log in. Before we can do anything, we need to log into our DigitalOcean account or create a new account at digitalocean.com.
Create a Droplet
After signing in, we need to create a Droplet. A droplet, technically the smallest unit of measurement in the ocean, is a term DigitalOcean uses to refer to an individual server instance. Essentially, we’re spinning up a single server.
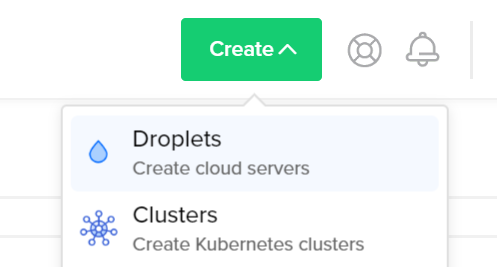
We can do this by clicking Create ⇒ Droplets. This will bring us to the Droplet configuration page.
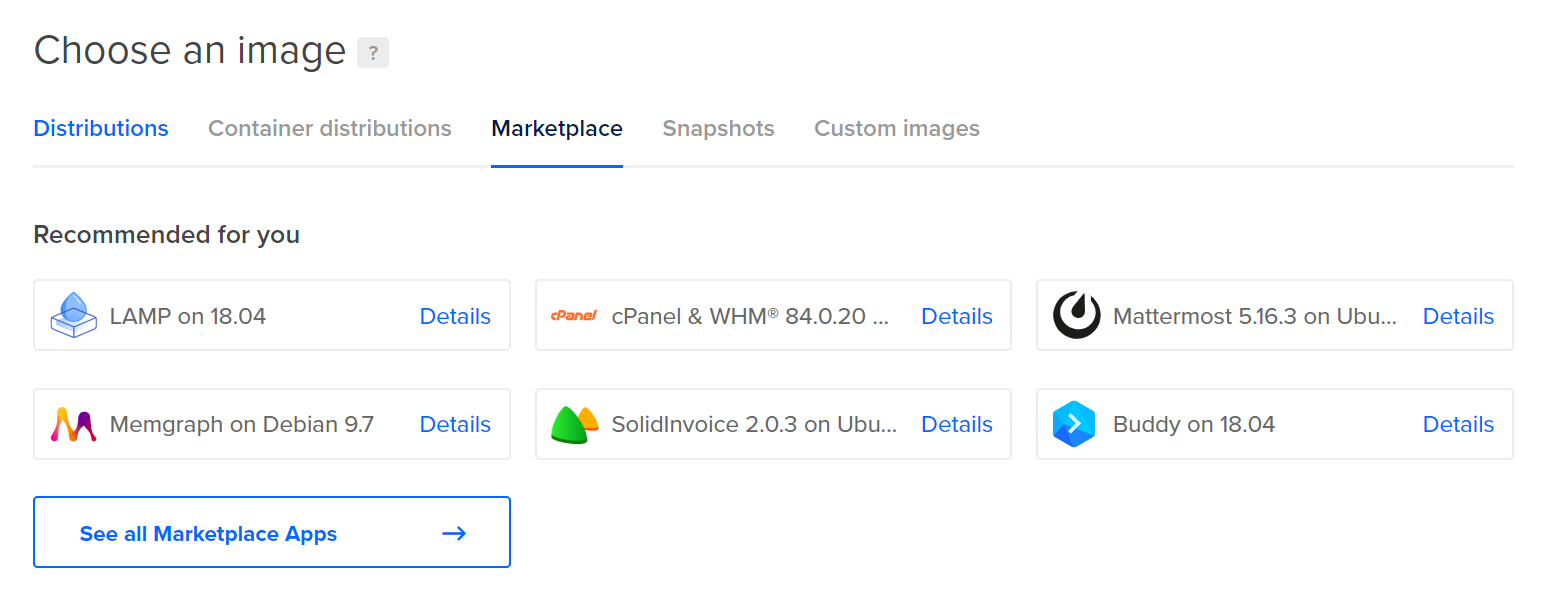
Choose an image
The image tells us what operating system and software/dependencies will be loaded onto the Droplet. Normally, for WordPress, you would need to spin up an Ubuntu server and install Apache, MySQL, and PHP to launch a LAMP stack for WordPress. Lucky for us, DigitalOcean has the One-Click App installs. With this, we can create a Droplet that has WordPress pre-installed and running on Ubuntu.
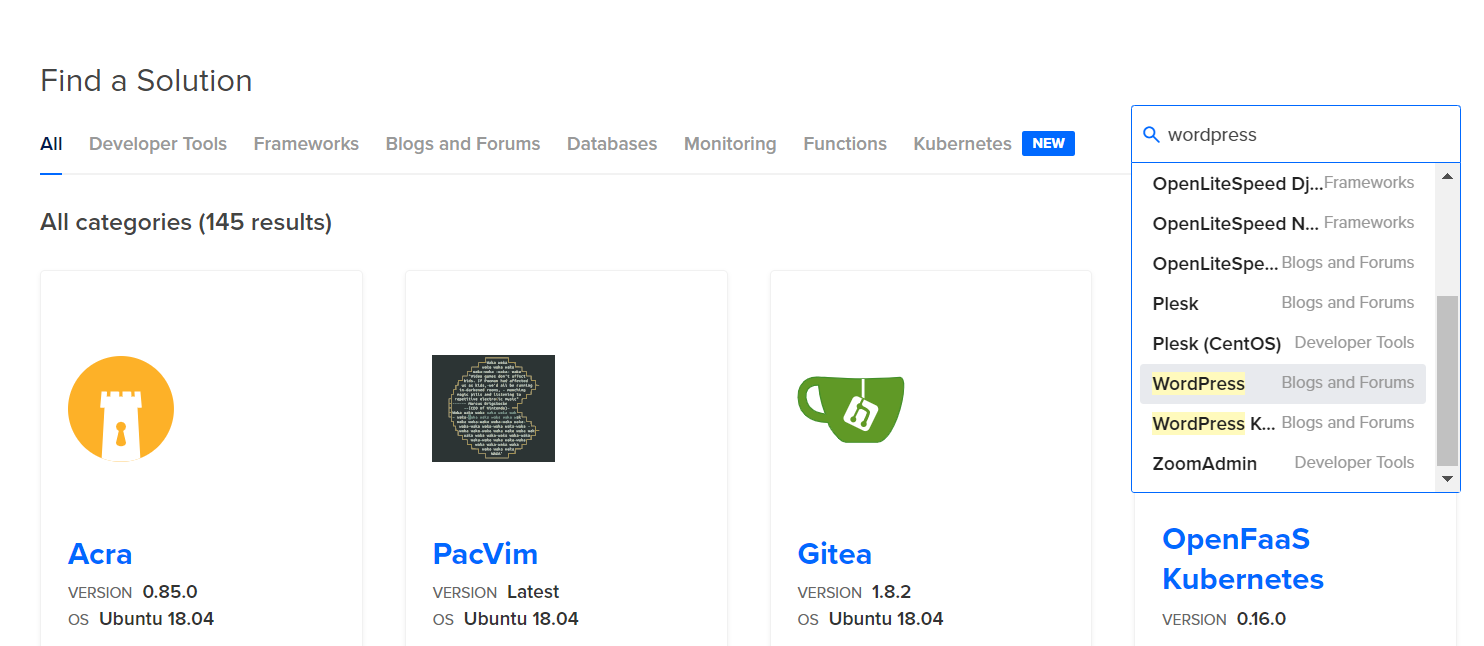
Let’s select Marketplace ⇒ See all Marketplace Apps to find this WordPress image.
You can search for wordpress or find it under the Blogs and Forums tab.
We can finally select Create WordPress Droplet.
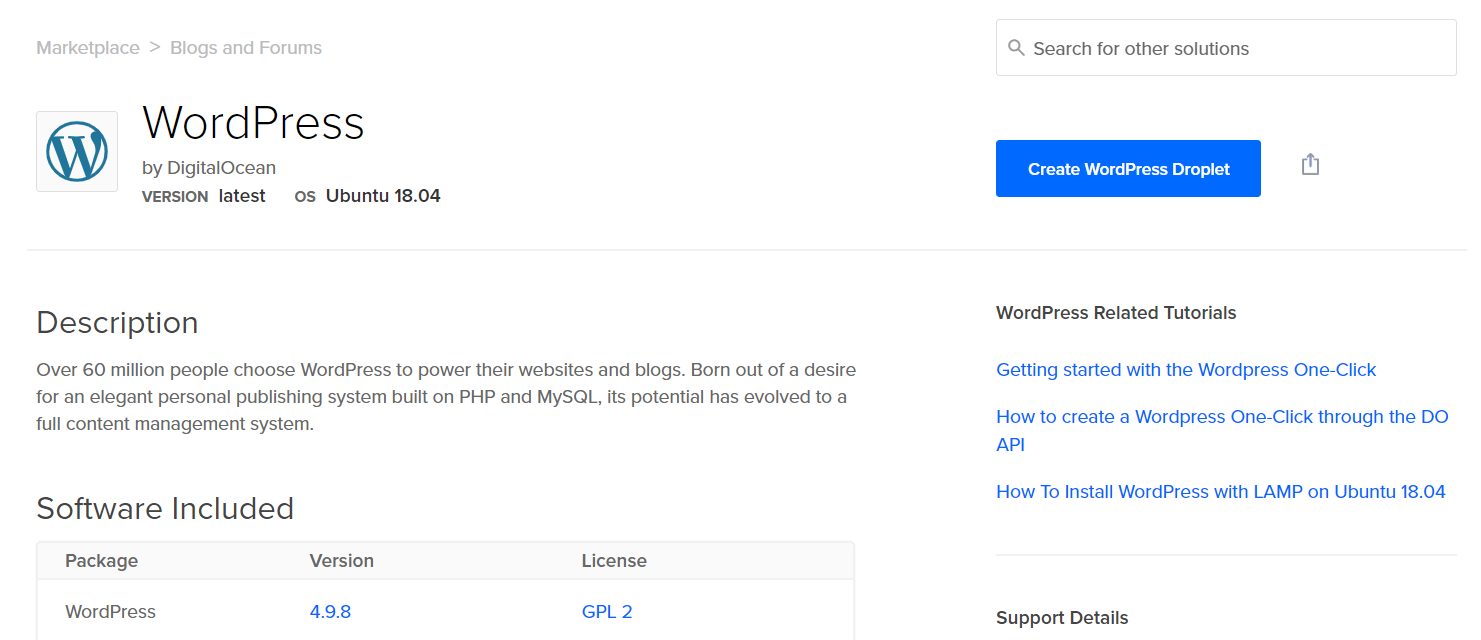
This should return us to the Droplet configuration page with the WordPress on 18.04 image selected. The “18.04” refers to the operating system that WordPress will be running on: Ubuntu 18.04. Depending on when you’re reading this article, the Ubuntu version may be different.
Choose a plan
The plan tells us how many virtual machines we want to be dedicated to our project as well as the price per month. For a blog, $5 per month is a very reasonable option, considering the price of other hosting options. This is what I started out with when I began logfetch.com
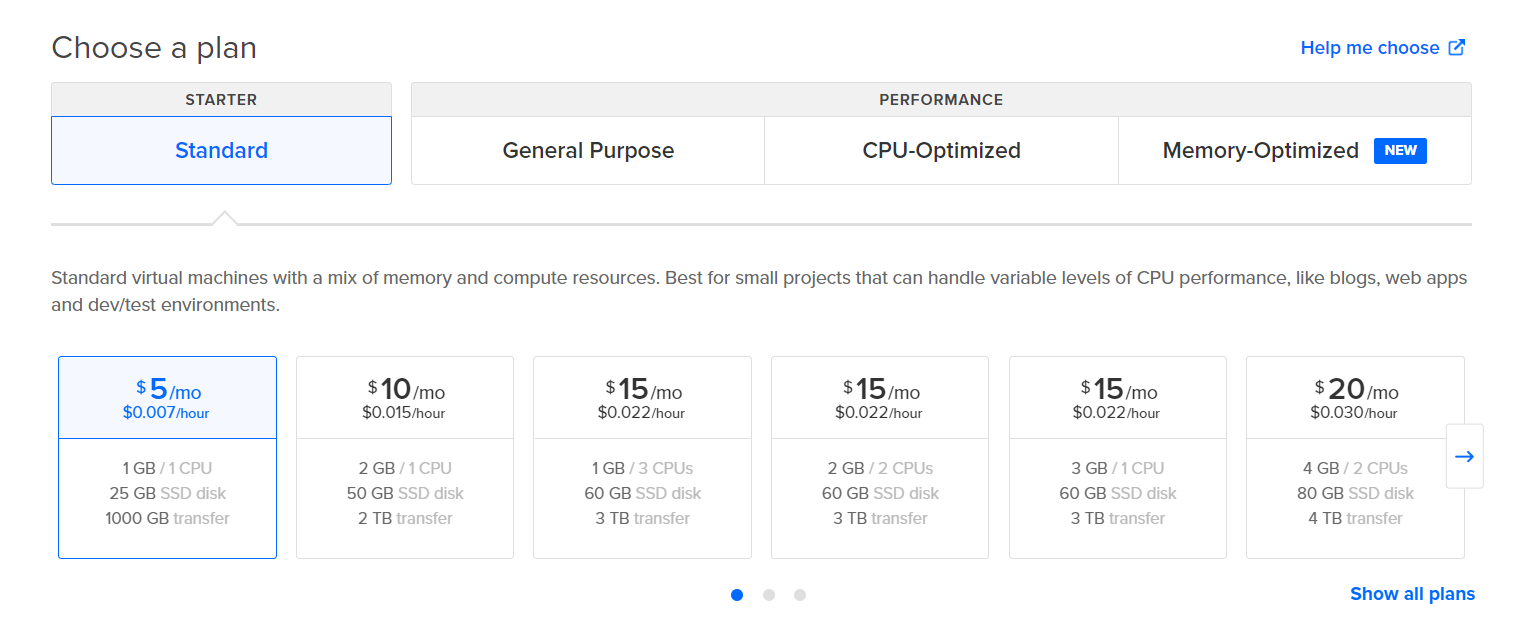
One great feature DigitalOcean offers is dynamic resizing. At any point in time, you can scale up the size of your Droplet (along with the price) if you find that you need more CPUs, disk space, or RAM.
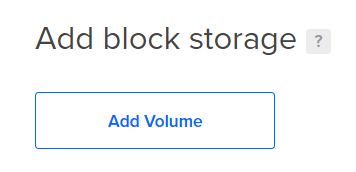
Add block storage
We’re not going to add block storage for now. The purpose of block storage is to increase our disk space. If your website has lots of images, then you can redirect those media files to store and load from this storage space.
Choose a datacenter region
We want to choose whichever datacenter is closest to the majority of our users. This will result in lower response times to the server due to the shorter network path (the closer servers).
To start I always choose the datacenter closest to me. Since I’m based in New York, naturally, I’ll choose one of the New York datacenters.

DigitalOcean actually released speedtest servers for every single one of its datacenters, which allows us to find the datacenter with the shortest latency from our location. Be sure to choose that one!
Select additional options
These are optional add-ons that I will leave blank and won’t go through in this article.
Authentication
For the sake of simplicity, let’s select One-time password for authentication.

Finalize and create
Lastly, we’re going to choose our hostname, which is simply an identifier. I usually use my domain name for the hostname since one WordPress site per server is sufficient. It containerizes our site and keeps everything a little cleaner.
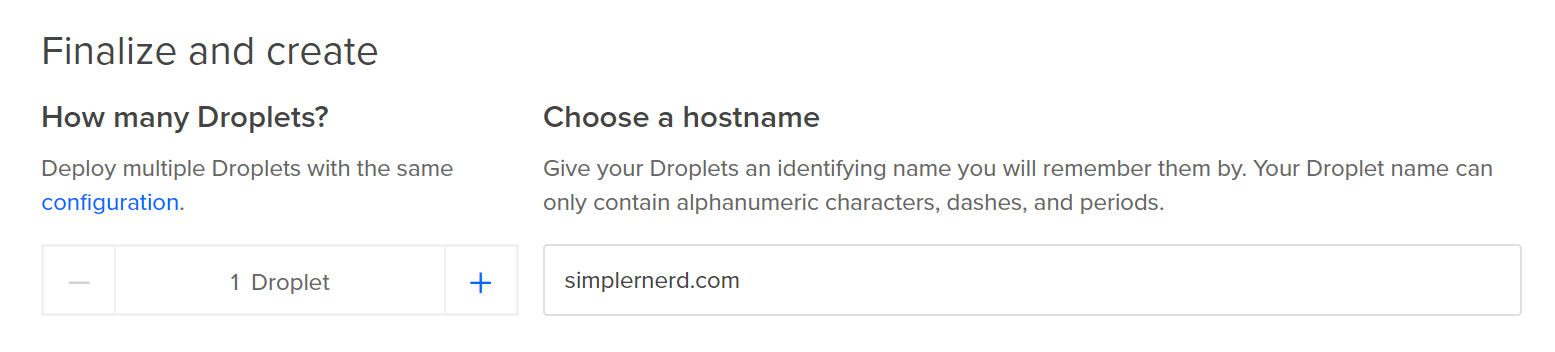
Select Create Droplet and then your server will be up and running in a few seconds!

A few minutes after your Droplet is created, you should receive an email that has all the credentials for your server, which looks somewhat like this:
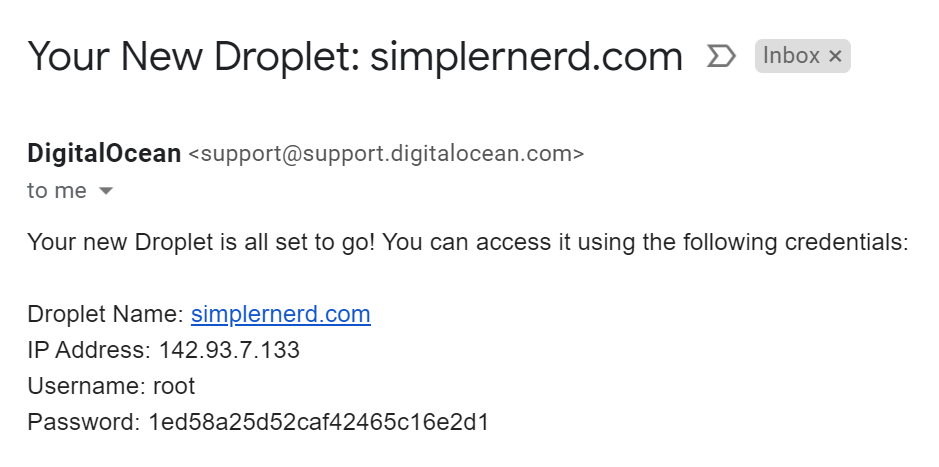
This has all the information we need to tie everything together to get your WordPress site started.
3. Connect Domain and Web Hosting
The first thing we want to do is connect the domain name we bought earlier to this web server.
Walkthrough: NameCheap Domain to IP
Access DNS Panel
If we go back to NameCheap and log in, we can access our Domain List through Accounts ⇒ Domain List.
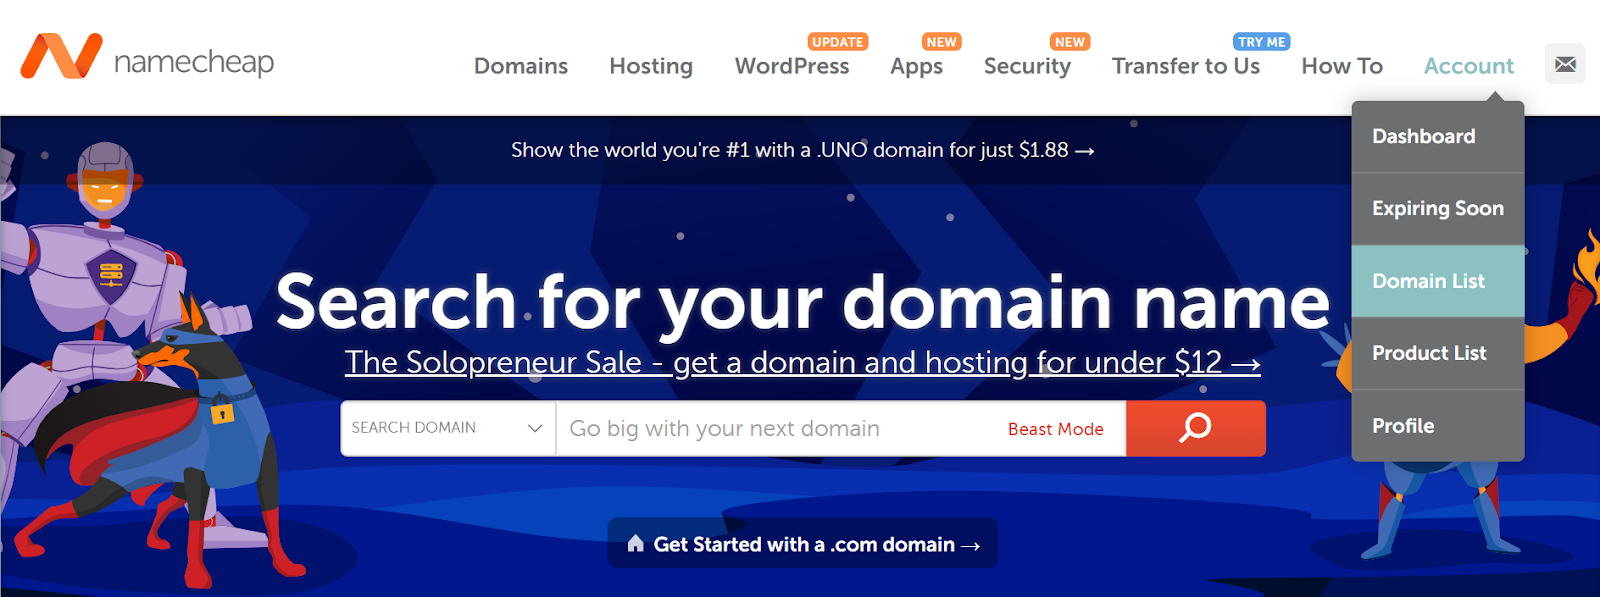
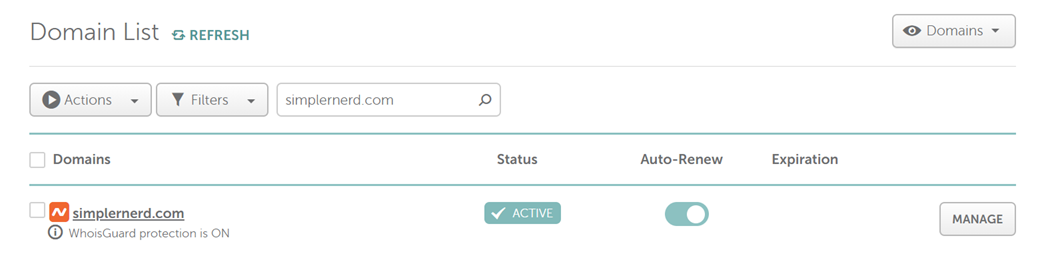
This will bring us to a list of, well, all our domains. Click Manage.
Select the Advanced DNS tab.
This is the state of my DNS panel for logfetch.com.
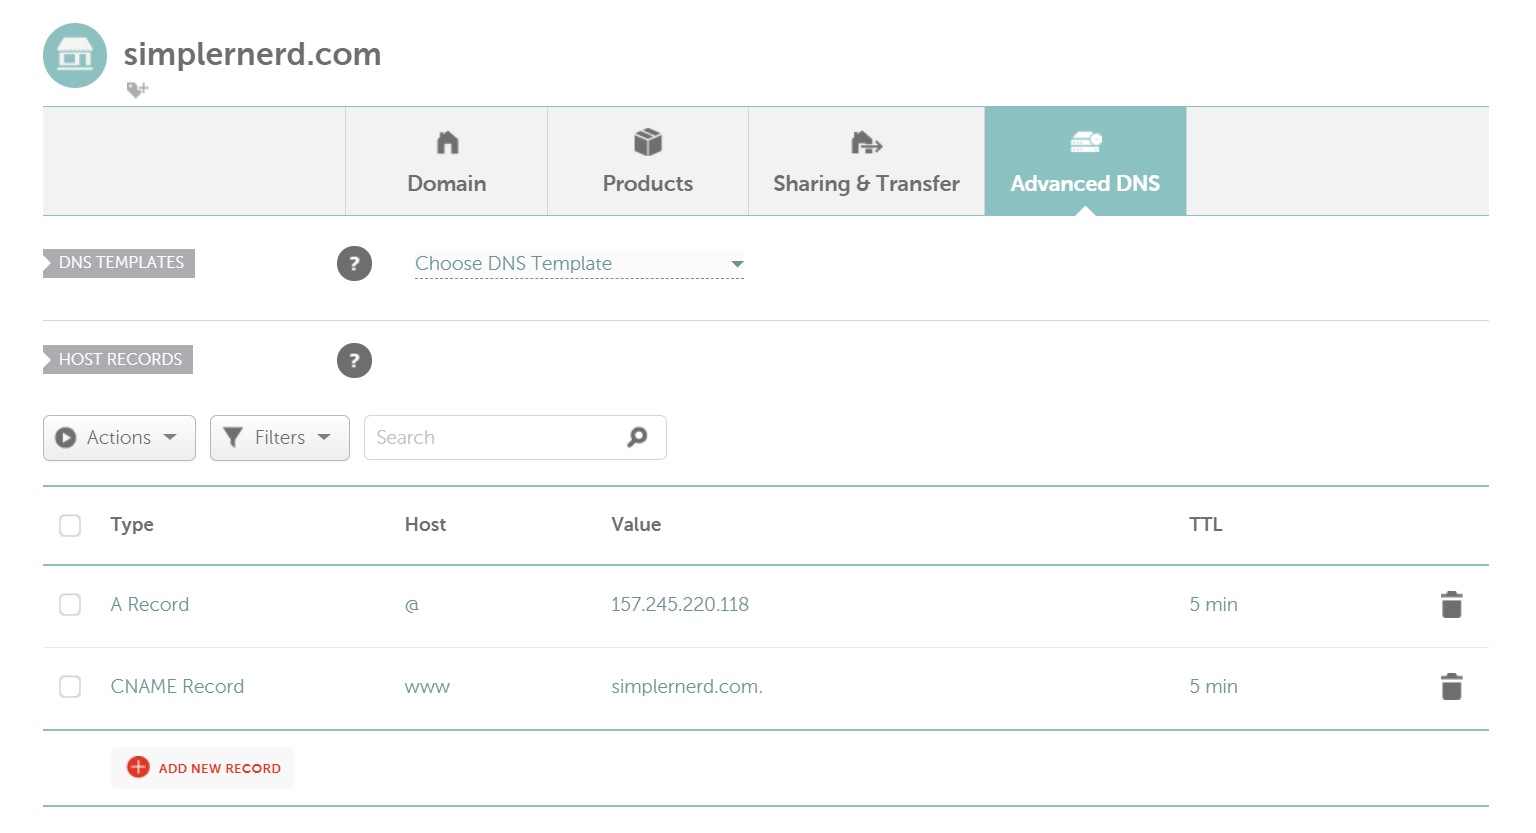
NameCheap defaults these records to other values because it doesn’t know where to point this domain. We have to manually fix that.
Modify the DNS configuration
We want 3 records total in our DNS configuration.
- An
A Record- Host:
@ - Value: the IP of our new DigitalOcean droplet
- Host:
- Another
A Record- Host:
www - Value: the IP of our new DigitalOcean droplet
- Host:
- A
CNAME Record- Host:
www - Value: our new domain name
- Host:
The TTL of all of these can be 5 min.
After a few minutes (up to 20 minutes), we should be able to access our domain name from the URL bar. If we haven’t yet configured WordPress, we should get a page with this message: Please log into Droplet with SSH to configure the WordPress installation.
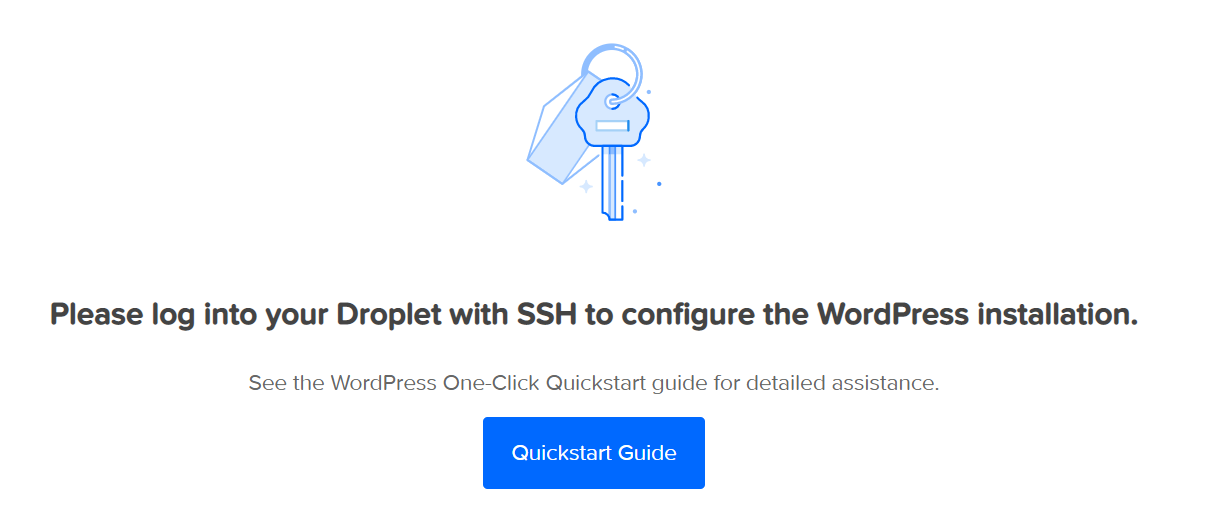
That’s what we’re going to do!
Walkthrough: Configure WordPress in Droplet
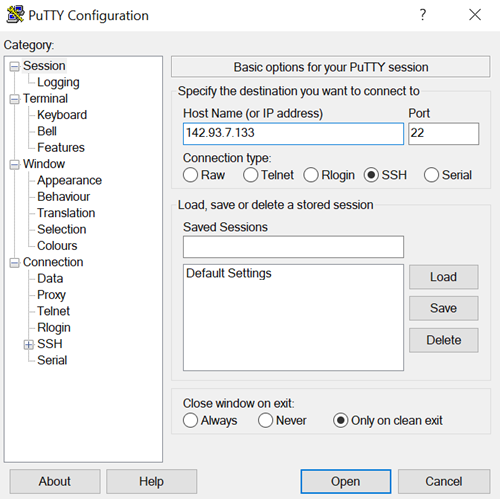
SSH into Droplet. We are going to remotely connect to our Droplet using the information in this email. I’m going to use PuTTy, a very lightweight SSH client.
We want to start by copying the IP Address from the email into Host Name of PuTTy, and then clicking Open. Technically, you could use your domain name here, but I use the IP address just in case I mess up the mapping in NameCheap. With the IP, I get direct access to the Droplet (no translation necessary).
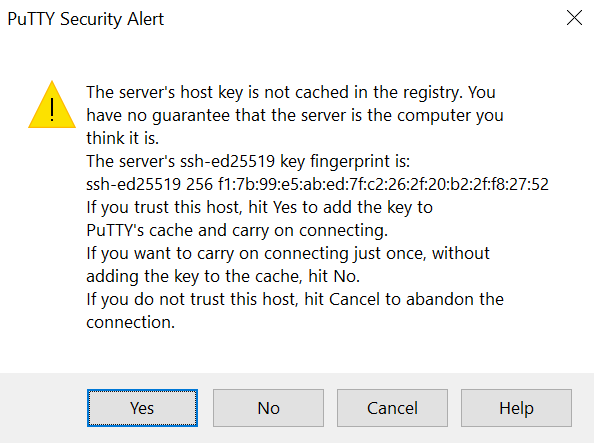
We’ll get a The server's host key is not cached in the registry alert, which is PuTTY simply telling us that we are connecting to a new SSH server.
When we connect, we’ll have to log in with the Username and Password provided in the email.
login as: root
root@142.93.7.133's password:
Upon doing so, we’ll get to change that horrendous password to something we normally use, like password123 (don’t actually use that).
Changing password for root.
(current) UNIX password:
Enter new UNIX password:
Retype new UNIX password:
Once we finish entering the new password, we’ll be prompted to enter the domain name for our site.
Fill out all the requested information. All this stuff is editable later.
When it asks, Would you like to use LetsEncrypt (certbot) to configure SSL(https) for your new site? (y/n):, type n. We’ll be doing that in the next section!
Congratulations! We successfully enabled WordPress on our server.
If you go to your domain, you’ll see the default WordPress installation up and running!
Technically, you have enough to get started, but for me, there are some more steps to go through before I’m satisfied with the foundation for my site.
4. Encrypt the Site
Explanation: Encrypted Websites
What in the world is an SSL/TLS, or HTTPS, Certificate?
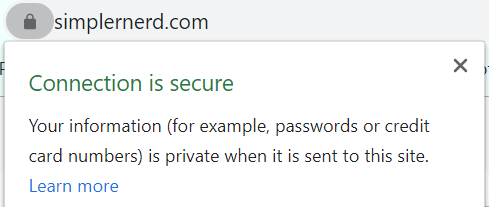
Have you ever seen either of these next to the URL bar?
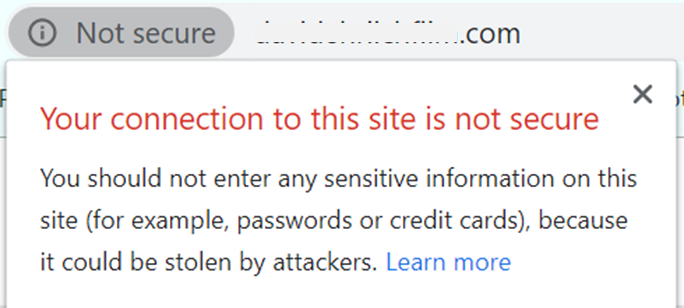
“Not Secure” indicates that a website is not encrypted. There’s no secure connection between your computer and the web server hosting that website. It’s running ordinary HTTP (HyperText Transfer Protocol), which is the system for transmitting and receiving information across the Internet.
The lock indicates that the site has enabled SSL/TLS Certificate. It’s running HTTPS (Secure HyperText Transfer Protocol), which is just HTTP with an extra layer of security. It secures the traffic between the server and its connected clients.
Is it necessary?
Technically, it’s not necessary. We don’t need to enable SSL/TLS Certificate for blogging websites or any other only content-based websites. There aren’t many transactions happening in these kinds of sites.
But, nowadays, it’s kind of necessary. If you enable SSL Certificates, it can be beneficial on three levels:
For Google. Google gives a higher preference to SSL-enabled sites. Essentially, the certificate will mark your website “safe” in Google’s eyes. Google is phasing out sites without “https” and even restricting them from search results. Moreover, it will allow you to conduct transactions online if you decide to ever run an online store.
For users. An encrypted website will help you gain the trust of your visitors. There’s a subtle sense of peace and assurance that comes with seeing the lock icon and the https. It demonstrates the care you have for your website and its content.
For you. When you first see that lock icon, it gives you a sense of legitimacy. It’s motivation to write that first blog post and to write a good one.
Now, how can I get one?
Walkthrough: Enable SSL/TLS Certificates
SSL/TLS Certificates can be both free and paid. They all do the same thing: offer a secured connection to your site.
Thanks to Let’s Encrypt, we can obtain SSL Certificates for free. In this section, we’re going to install an HTTPS certificate in our WordPress droplet.
You’ll see that you don’t have HTTPS installed since https://yourdomainname.com will return an error page, whereas http://yourdomainname.com won’t.
SSH into Droplet. The first thing we have to do is to remotely access our Droplet using PuTTy. We want to run this command, replacing logfetch.com with your domain, of course.
$ letsencrypt --apache -d logfetch.com
First, you’ll be asked for your email address. This will only be used for any urgent notices. Type your email address.
Second, you must agree to the Terms of Service.
Third, you can decide whether you want to share your email address for their newsletter.
Lastly, and most importantly, you’ll be asked whether you want to redirect all HTTP traffic to HTTPS or simply leave HTTP and HTTPS accesses separate. I don’t see any reason to leave HTTP access available, so select Redirect.
Please choose whether or not to redirect HTTP traffic to HTTPS, removing HTTP access.
- - - - - - - - - - - - - - - - - - - - - - - - - - - - - - - - - - - - - - - -
1: No redirect - Make no further changes to the webserver configuration.
2: Redirect - Make all requests redirect to secure HTTPS access. Choose this for
new sites, or if you're confident your site works on HTTPS. You can undo this
change by editing your web server's configuration.
- - - - - - - - - - - - - - - - - - - - - - - - - - - - - - - - - - - - - - - -
Select the appropriate number [1-2] then [enter] (press 'c' to cancel): 2
Congratulations! Once you see your success message, you should be able to access https://yourdomainname.com.
Walkthrough: Auto-renew SSL/TLS Certificates
One of the sad things about Let’s Encrypt is that their certificates expire every 90 days, which means you would have to remember to manually renew your certificates.
Luckily, we can set up these certificates so that they renew automatically using cron jobs. The word “cron” refers to the cron daemon, which is a background process that executes commands at specific dates and times. It’s particularly helpful for repetitive events and overnight tasks that need to be completed.
We can use the crontab file to execute a script that will renew the SSL certificate if it’s about to expire. The script will run every day at 5 am on the server without you even knowing it.
Let’s run this command to edit crontab.
$ sudo crontab -e
Enter this line under all the comments inside crontab. You can read the comments to understand the syntax of these commands.
0 5 * * * /usr/bin/certbot renew --apache --quiet
Test auto-renew
You can perform some auto-renew testing using dry runs, which is a process that will execute the auto-renew script without actually renewing the SSL certificates. This will allow you to find any errors that the script may have.
You can do this by renewing with the –dry-run flag.
$ /usr/bin/certbot renew --apache --dry-run
Great! You’ve configured your SSL certificate to automatically renew right before it expires.
5. Index the Site on Google
Alright, at this point, we have a domain name that users can type into their browsers.
We’ve secured that domain name with Let’s Encrypt and turned on auto-renewal.
We have a web server running 24/7 on DigitalOcean that is serving our default WordPress site to our visitors.
The next step is to prepare for SEO.
SEO stands for Search Engine Optimization. It refers to anything we do that will improve our search engine rankings. Our ranking is the placement of our site amongst every other site on Google for a given keyword.
Naturally, everyone’s goal is to have their website ranked on the first page of Google’s search results. Sometimes, however, that isn’t even enough. One page of Google search displays 10 websites, and Advanced Web Ranking found that 67% of clicks go to the first five results while only 3.73% of clicks go to results 6-10. Wow, that’s a lot of pressure.
So that’s the goal, but how do we even get our website to show up on Google?
This is called indexing.
Indexing
Simply put, when Google successfully “indexes” a page on your site, that page will show up in Google. You’ll notice that our site isn’t on Google yet by typing site:yourdomainname.com. Google will output every page that Google has indexed with this prefix.
In order to index our site, we need Google Search Console. Go to Google Search Console to add your domain.
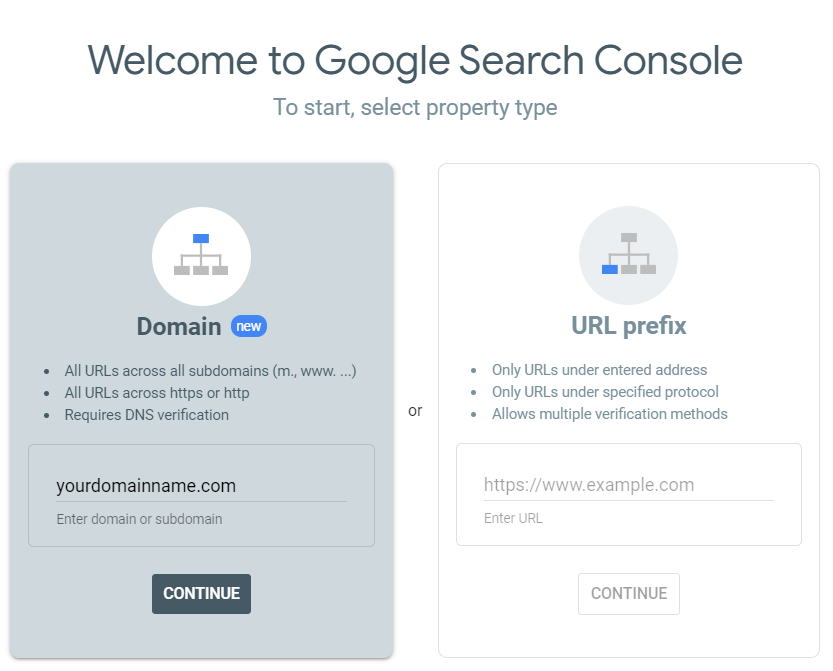
Before you can index anything, you need to prove to Google that you own this domain. You’ll be prompted with this pop-up.
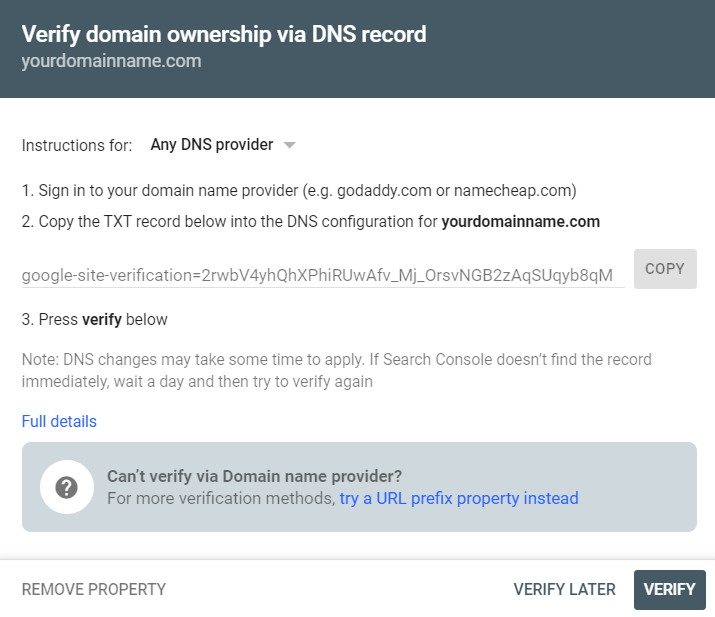
Let’s go back to the NameCheap DNS panel that we were working on earlier to add this TXT record.
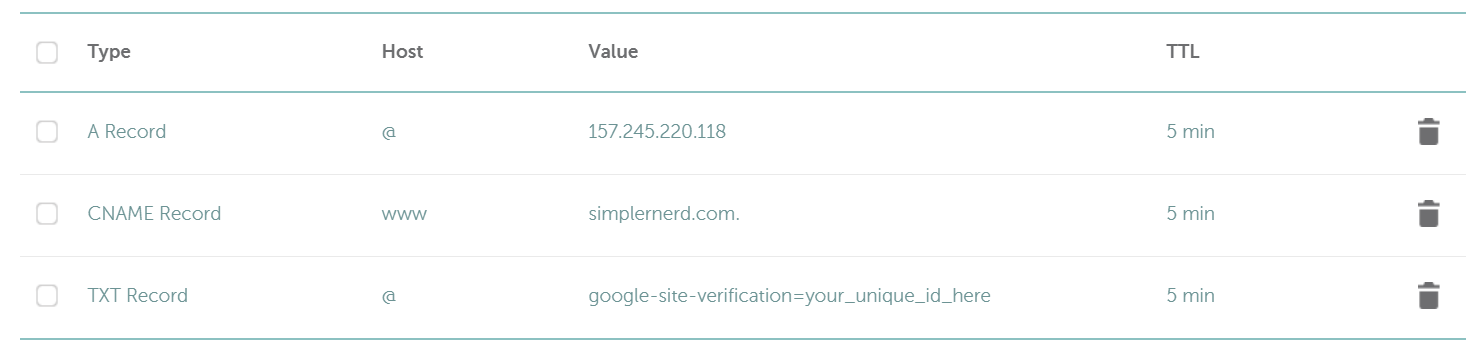
This is the state of my DNS panel after adding the domain verification. This may take a little time to propagate all the way to Google Search Console, so click Verify once in a while until you see a success message.
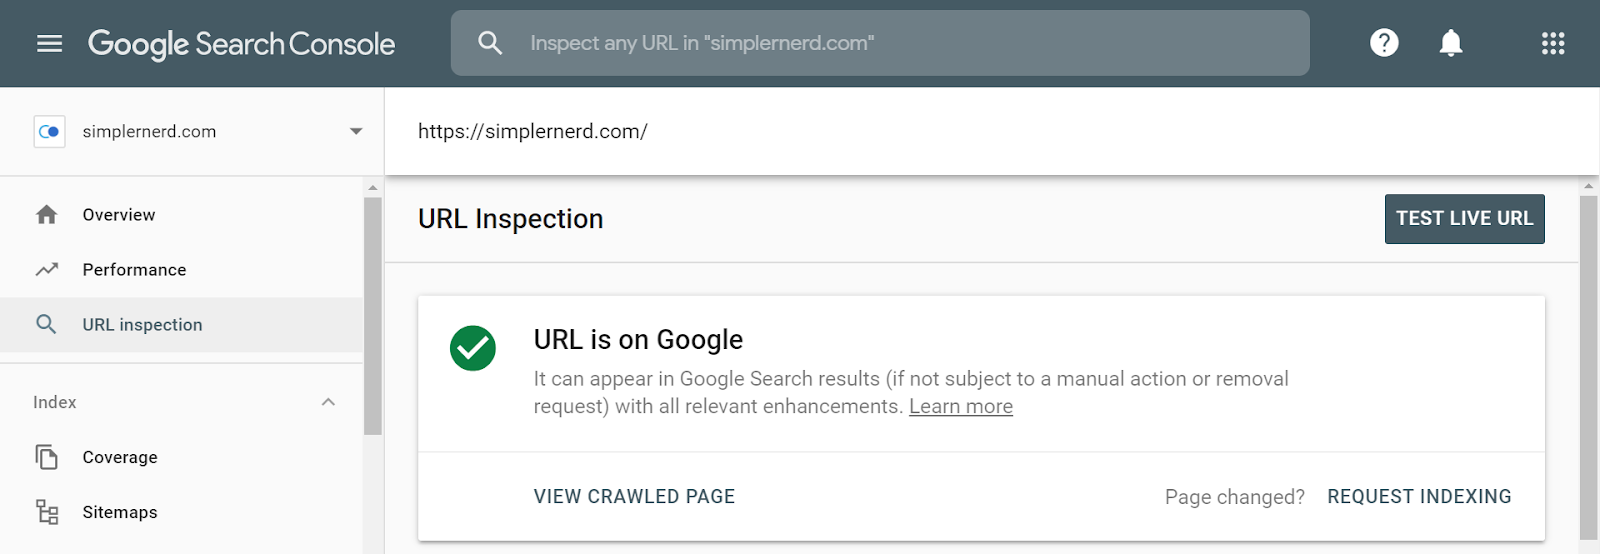
Once that happens, you can navigate to the URL inspection tool and paste in the URL of your website. If your site is indexed, it will say URL is on Google.
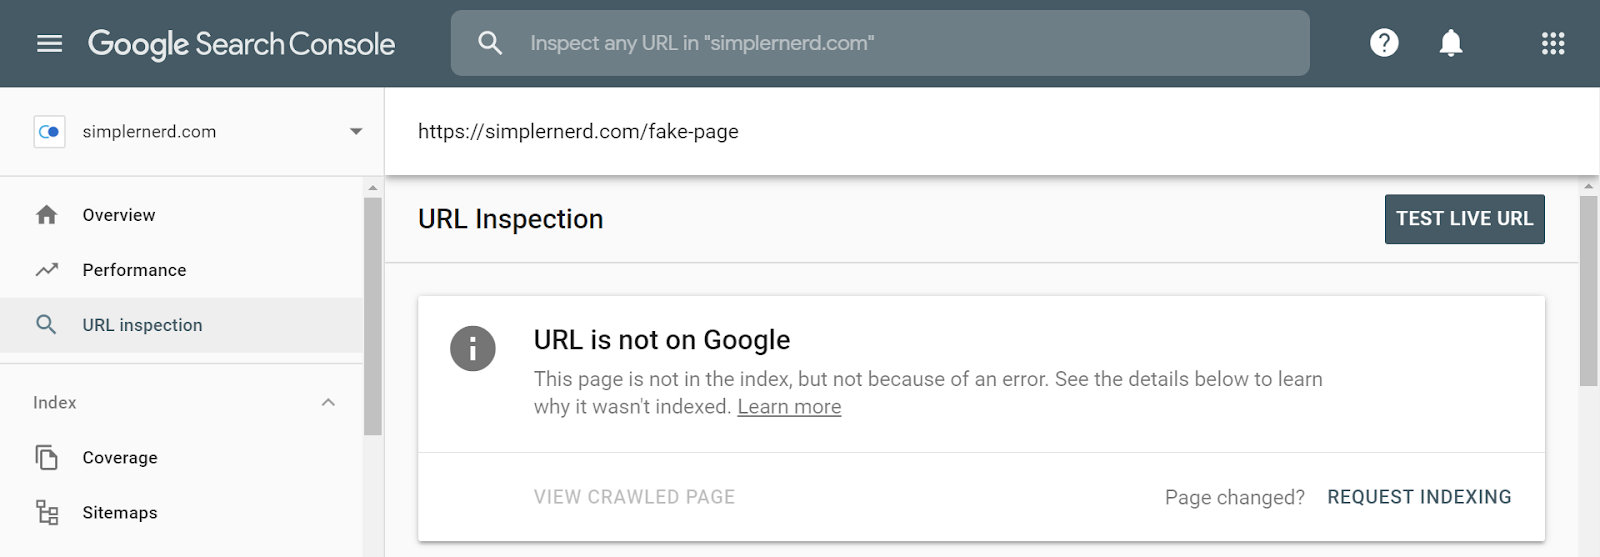
If you inspect a URL that is not indexed by Google, it’ll say URL is not on Google.
Request indexing
You’ll notice whether or not your URL is on Google, you can always request indexing.
When your URL is not on Google, you are requesting for your page to be added to Google. This is most common after you write a new blog post. You want Google to index this site as fast as possible. After a while, Google will automatically add the site, since they do automatic crawls of indexed webpages for new links, but manually indexing each page will speed up the process. This is the process I go through after every new blog post:
When your URL is on Google, you are requesting for your page link to be updated on Google. If you update your blog post, your visitors will automatically see the new page when they visit that post, but Google may not have updated the title or description that they show in the search results. That’s when this comes in handy.
Great! You’re on Google now and ready to go to WordPress!
6. Choose a WordPress Theme
How do we choose our WordPress theme?
Obviously, you want it to look nice and aesthetically pleasing, but there’s more to it.
It should be lightweight. You want a theme to be lightweight so that your site loads quickly. You don’t want it bloated with a bunch of features you won’t use.
It should be SEO-friendly. You also want a theme to be understandable by Google. If the website is structured in a way that confuses Google (e.g. multiple h1 tags on a single page), it could hurt your rankings.
It should be responsive. You’ll want your site to load well on both desktop and mobile devices. You might be surprised as to where most of your traffic is coming from, so try to prepare for both scenarios.
It should be customizable. You want to be able to add your own flair to your site, so make sure you’re given the option to!
Free vs. Premium Themes
In the beginning, these are difficult criteria to search for, so I’ll give you a few free and premium theme recommendations that I’ve used in the past.
I like free themes. For free themes, I would recommend GeneratePress, Astra, and OceanWP. All of these are proven to be smaller themes that don’t make too many requests for page loads, which allows for a faster website overall. They are also the most customizable free themes I’ve come across.
But premium themes are better. For premium themes, I would recommend the premium versions of the free themes as well as Divi and StudioPress.
These themes generally require either an annual subscription or a lifetime subscription to their program. They can appear pretty pricey at first, but trust me, it is absolutely worth it. You get access to all of their themes, plugins, and even courses.
Changing themes is painful. Another reason to choose premium themes is that, unlike switching from a $5/mo plan to a $10/mo plan on DigitalOcean, switching from GeneratePress to Divi will be painful.
Each theme is structured and styled very differently, so the styles will not translate well if you’ve already configured everything for GeneratePress. That’s why it might be a good idea to choose a premium theme early on.
So that’s that! At the end of the day, I would recommend the premium theme Divi for its customization and community support.
7. Install Useful WordPress Plugins
While themes add to the appearance of your site, plugins add to the functionality of your site.
There are some plugins that I find necessary for every site that I create on WordPress. These are those plugins:
CodeMirror Blocks. A developer blog is likely to have some code snippets, right? This is probably the most visually appealing and customizable plugin I’ve found for code snippets.
Favicon by RealFaviconGenerator. After you’ve created a logo for your brand, you’ll want the icon to show in your browser tab.
This plugin is the most comprehensive plugin for favicons. It ensures that the favicon you use is compatible with Windows, Mac, iOS, Android, Surface devices and more.
Simple Custom CSS. Customizing your WordPress site to your liking is possible through CSS. Using Simple Custom CSS will allow your custom styles to persist through theme updates. Anything you type into Additional CSS will be lost when your theme updates, so this plugin is essentially a separate place to store your custom CSS.
UpdraftPlus – Backup/Restore. It’s always great to get into the habit of backing up your WordPress site. You can backup on both DigitalOcean and in WordPress. This is the plugin to do that.
Wordfence Security. This is the plugin to secure your WordPress site. It will block malicious traffic, prevent attackers from brute-forcing their way into your admin dashboard, and protect your site in ways I don’t even fully understand.
WP-Optimize – Clean, Compress, Cache. All site owners want to accelerate their site’s performance. Plugins like this optimize load times by compressing images, storing static elements of your site (e.g. posts and pages), and regularly cleaning up the database.
Yoast SEO. This is the most important plugin for SEO. It provides a ton of options for site optimization. I mainly use it to ensure that my articles are targeting my desired keywords. Check out this Yoast SEO Tutorial here Kinsta.
8. Start Writing!
You’re now ready to write your first blog post.
You have your domain name, web host, SSL certificate (with auto-renewal), a beautiful theme, as well as some very useful plugins.
But how do we know specifically what to write about?
Write about answers to questions that you’ve asked before. This is the first thing I do when I’m stuck. I think this is a great option since the questions I ask are usually questions that other people are also searching for.
Make a list of all your ideas. Some will be great ideas and some will be terrible ideas. That’s okay! We’re going to filter this list with some keyword research, which is the process of analyzing words and phrases that people use in search engines.
You want low competition
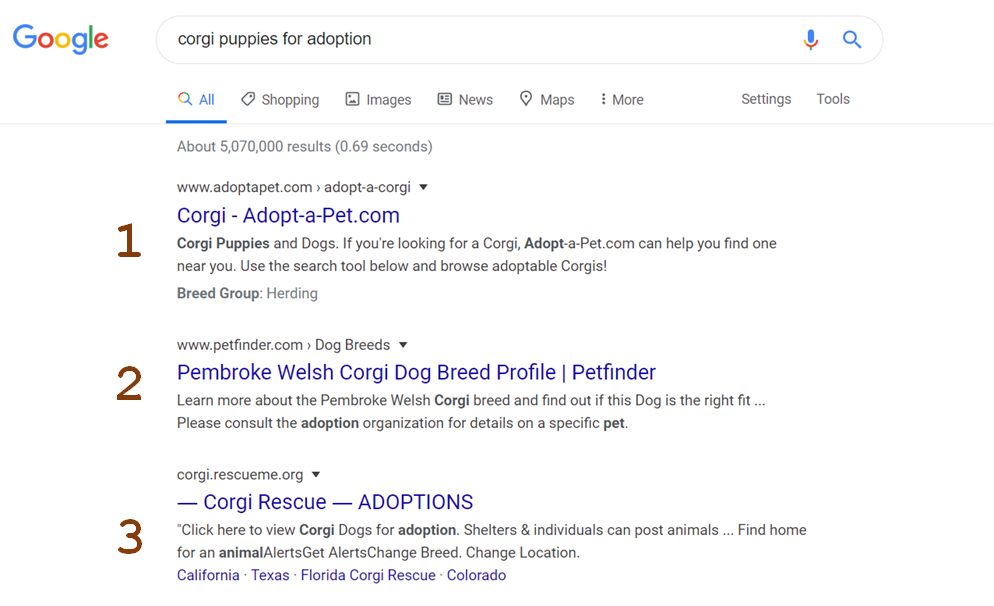
The first thing you need to determine is the competition. If I wanted to write an article on how to start a blog, I would search that phrase in Google.
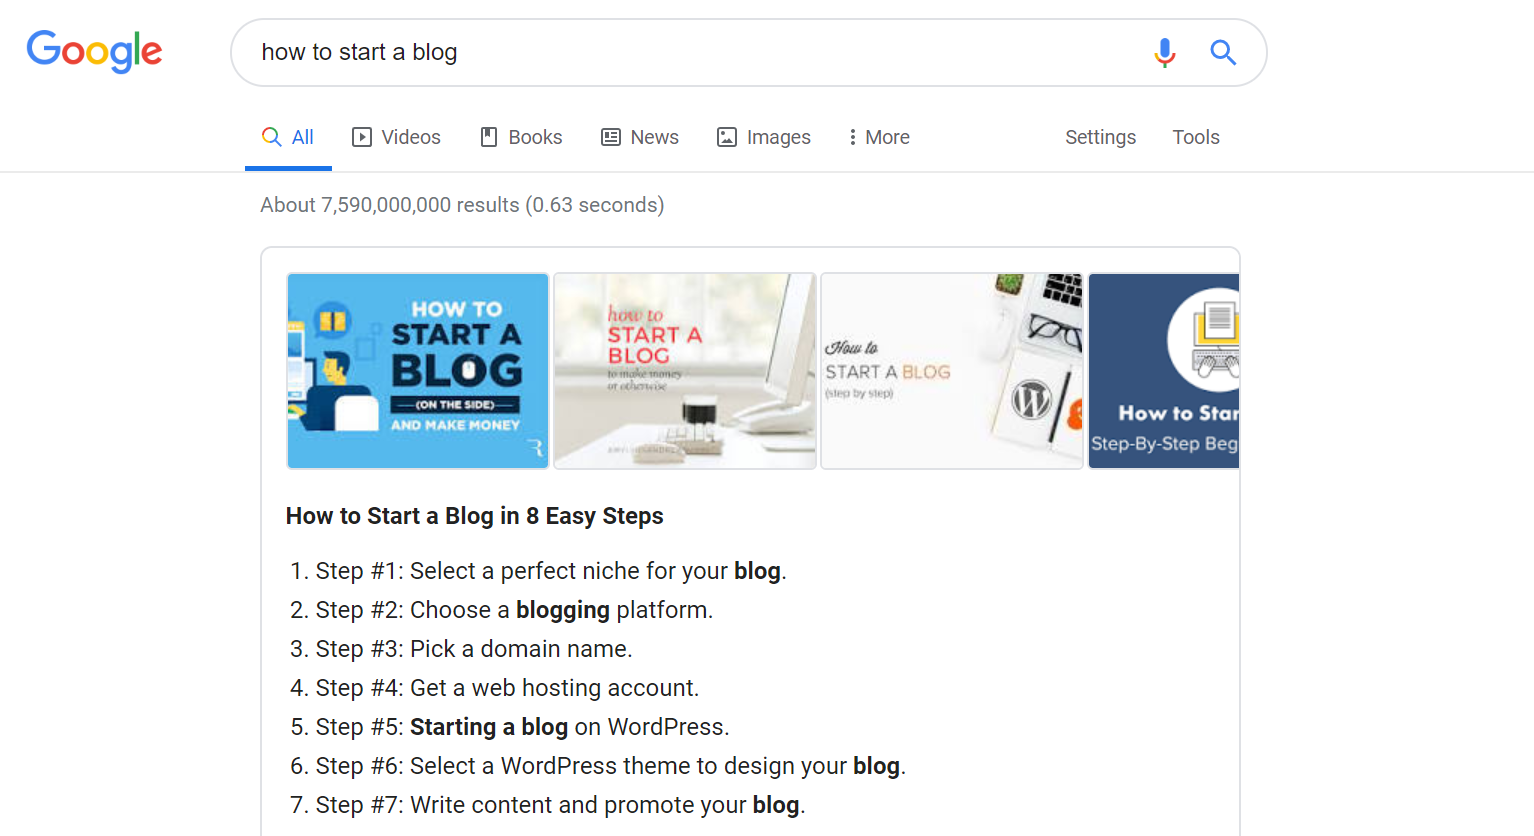
Google gives me over 7 billion results. That means there are 7 billion websites out there related to this topic.
It will be very difficult to find success with all that competition. That’s why we want to target long-tail keywords, which means more specific keywords.
Maybe I’ll write an article specifically on SquareSpace blogging.
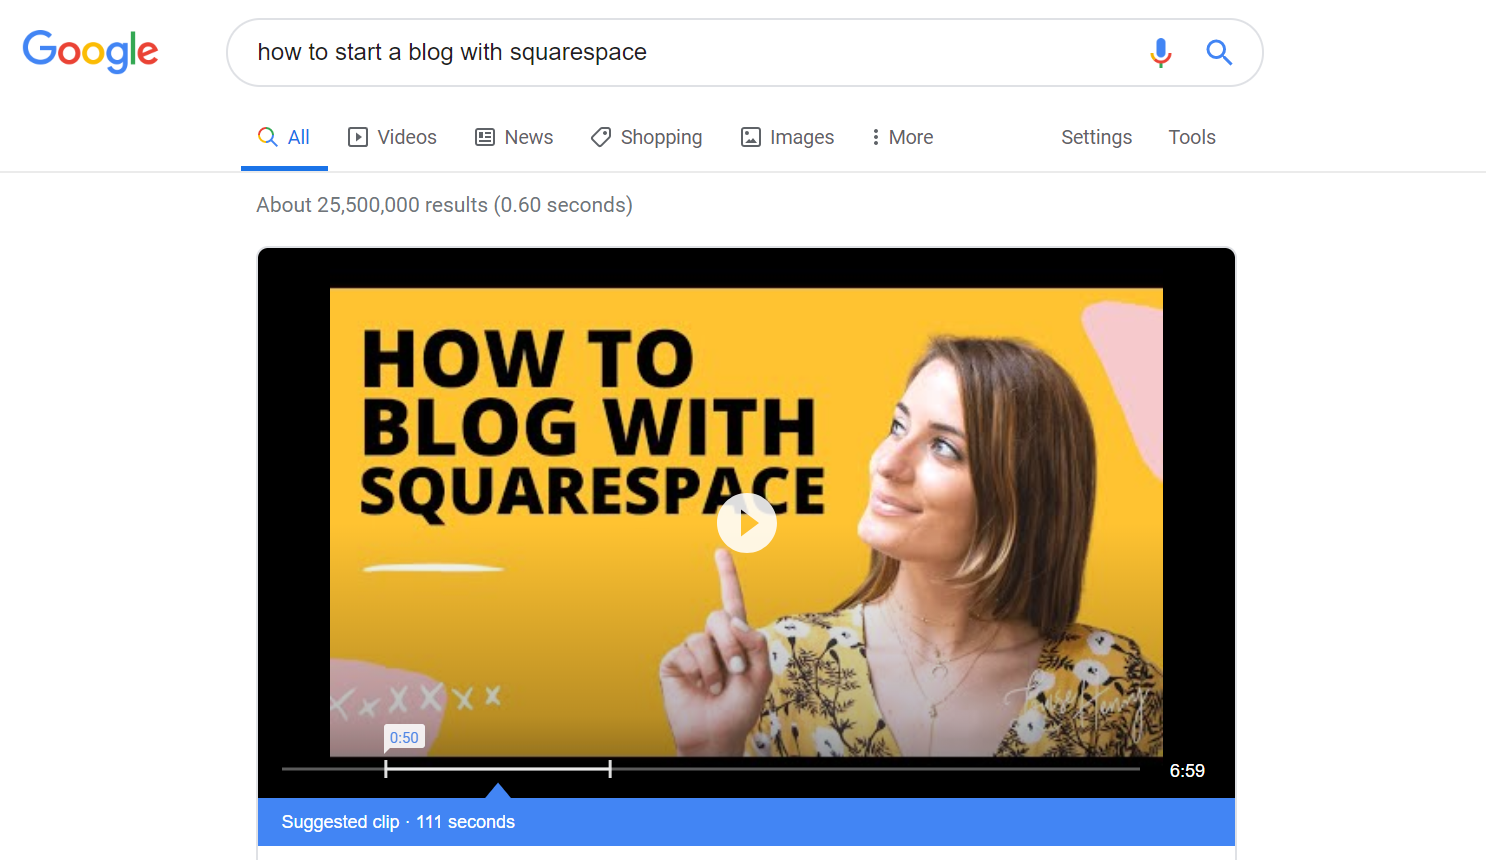
25 million results! So the competition is getting smaller, but still kind of high.
If your results are ever under 1 million, then you might’ve hit the jackpot.
You want high search volume
Once you’ve found a topic with low competition, you want to check that users are searching for that phrase or keyword.
Head over to Google Trends and type in your low competition phrase or keyword.
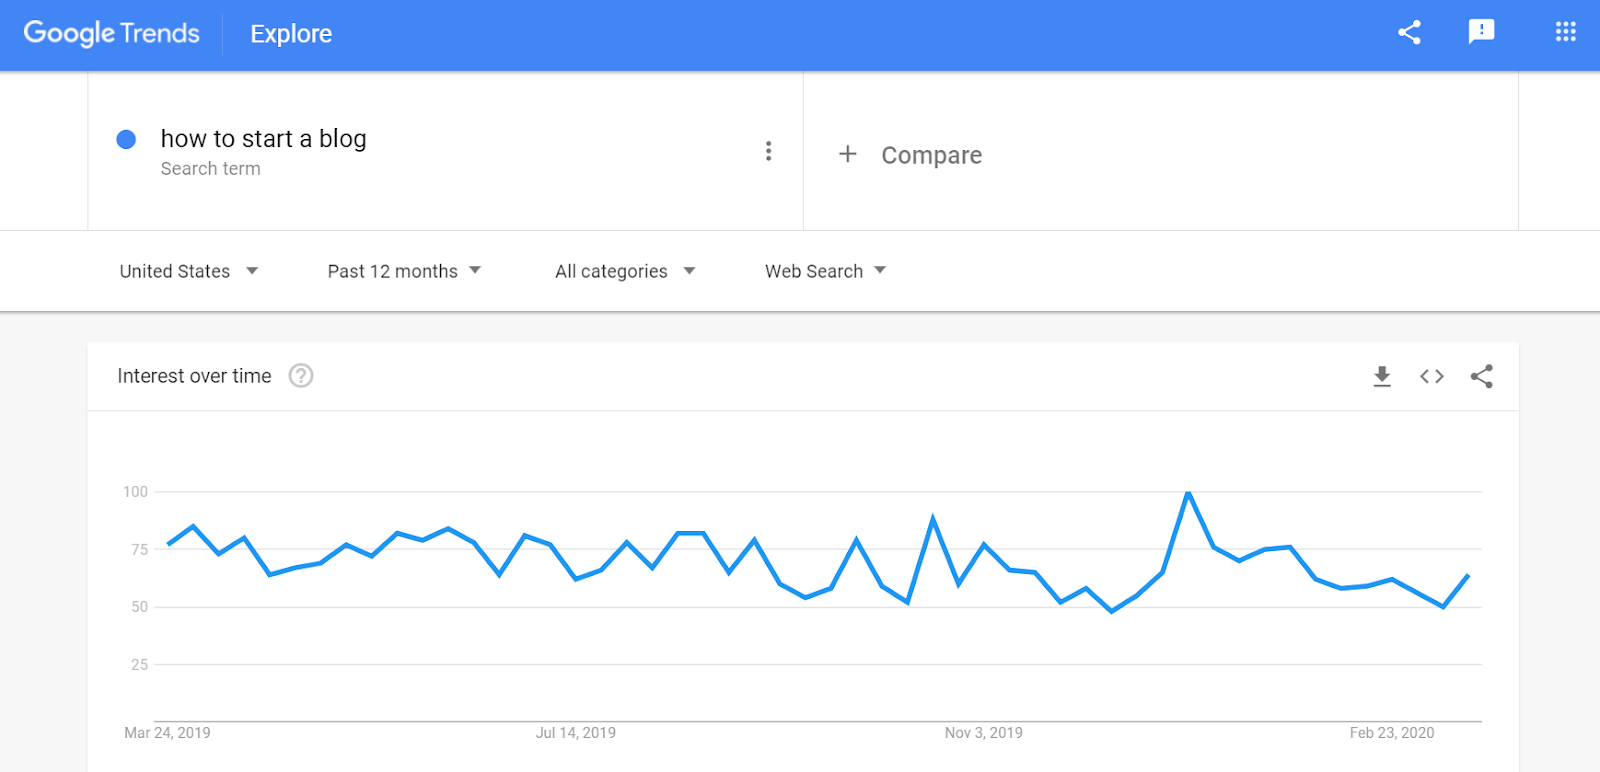
If the trend line is growing or at least somewhat stable, then this may be a topic worth writing about.
You may not be able to obtain information about very specific, long-tail keywords or phrases, but this will give you a general gist of search volume on Google.
Hopefully, this basic keyword research makes sense to you! We want low competition and high search volume. We’re targeting topics that users want to know about but writers haven’t written about.
Conclusion
Congratulations on getting through this guide!
There’s a lot more to do in terms of visual customization, SEO, and marketing, but this is the process I always go through when starting up a new website.
With this foundation, I want to wish you all the best of luck starting your blogs 🙂